
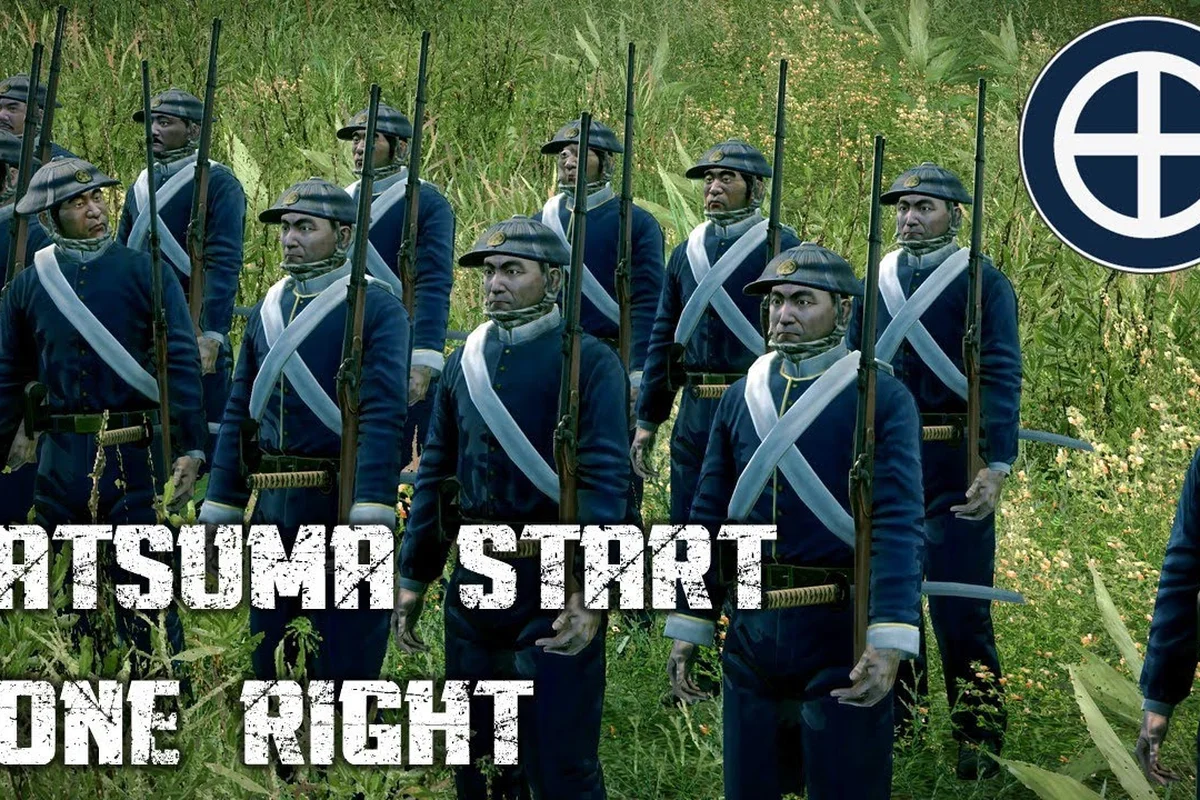
Satsuma sits at the bottom of the Satsuma province in southern Kyushu, staring north across a long string of hostile clans, and that single geographic fact shapes every choice in the Shogun 2 Satsuma clan guide. The southern domain opens the Fall of the Samurai campaign as an Imperial power, which means gunpowder infantry, foreign trade income, and the ability to recruit matchlock-armed ashigaru earlier than almost any rival. Picking Satsuma is a commitment to a long, modernised war of attrition, and this guide walks through the opening economy, the early unit rush, and the Imperial-vs-Shogunate decision that decides who wins the Boshin War, while players weighing alternative starts can compare every playable clan side by side in our Total War Shogun 2 Factions breakdown.
Satsuma's Starting Position and the Imperial Toolkit
Satsuma begins the Fall of the Samurai campaign cut off from the main Honshu landmass, surrounded by the seas of southern Kyushu and one land border into the neighbouring province. According to community-tested openings on the Steam guide hub, that isolation is both the clan's biggest weakness and its biggest lever, because the AI has to either commit a navy or walk a slow army through a single choke to threaten you, which buys time to build the Imperial economy before the first real war.
The Satsuma toolkit leans heavily on modern infantry and diplomatic aggression. Out of the gate, the faction can recruit Matchlock Ashigaru earlier than Shogunate powers, and the Imperial research path lets the player stack cheaper matchlocks with a small but elite Shinsengumi-style support line. The faction bonuses, as listed in the Fall of the Samurai faction overview on Wikipedia, emphasise foreign trade income and a unit roster that pivots around firearms rather than traditional cavalry, which means the player's first stack should be designed around gunpowder rather than honour-bound samurai duels.
The Two Faction Schools at a Glance
Before the campaign starts, every Fall of the Samurai player is really choosing one of two strategic cultures. The Imperial faction pool includes Satsuma, Tosa, Choshu, Hizen, and Ogaki, while the Shogunate side runs Aizu, Nagaoka, Jozai, Obama, and Sendai. The Satsuma opener only makes sense if you understand the contrast at the meta level.
| Aspect | Imperial (Satsuma, Tosa, Choshu, Hizen, Ogaki) | Shogunate (Aizu, Nagaoka, Jozai, Obama, Sendai) |
|---|---|---|
| Core unit identity | Matchlock infantry and modernised line infantry | Traditional samurai, yari ashigaru, and cavalry |
| Economic strength | Foreign trade and port-based income | Land tax and provincial agriculture |
| Research bias | Industrial and modern arms tech | Bushido military arts and castle defence |
| Best opening strategy | Rush matchlocks, secure a port, build trade | Build castles, recruit retainers, hold ground |
| Weakness in early game | Higher upkeep on modern units, vulnerable to naval blockades | Lower trade income, slower unit upgrades |
The Satsuma campaign only feels slow if you treat it like a Shogunate playthrough. The Imperial school is built around a matchlock rush, a foreign-trade economy, and a willingness to push the Realm Divide clock, which is the moment in the campaign when the Emperor's supporters are forced to fight every other clan on the map at once.
Why Satsuma Specifically, Not Tosa or Choshu
The other big Imperial clans play very differently, and the right pick depends on whether you want Satsuma's southern port economy or a more landlocked opening. Tosa sits next door to Satsuma and leans even harder on trade and naval income, but it starts with a weaker army and fewer matchlock slots. Choshu is the most militaristic of the three, with a stronger opening army and a shorter route to high-tier Imperial infantry, but it begins surrounded by Shogunate neighbours and pays for that with a tougher first ten turns.
Satsuma is the middle path. You get Tosa's trade focus without Tosa's defensive weakness, and you get Choshu's military spirit without Choshu's cramped start. For a player who wants to play aggressively on the Imperial research branch without being instantly pinned from turn one, Satsuma is the cleanest first campaign.
The Opening Economy: Foreign Trade, Tax, and the Satsuma Port Chain
Satsuma's economy runs on Foreign Trade, not land tax, which means the first ten turns should look like a port-and-trade rush rather than a farm-and-market grind. The province's port slot is the most valuable building in the early game because every level of port upgrades both the trade volume and the diplomatic value of a trade agreement with an Imperial power or a foreign Pacific port. According to community testing on the r/Shogun2 subreddit, experienced Satsuma players consistently rush the port to tier two before committing to any expensive unit recruitment, because the trade income alone funds the matchlock switch by turn twelve.
Trade Income vs. Tax Income by Turn
The trade-vs-tax decision is one of the most under-documented choices in Fall of the Samurai, and it has a measurable impact on the opening economy. Below is a community-compiled estimate of the income curve for a Satsuma province that prioritises port upgrades over farm chains, based on the kind of numbers that show up in Steam's long-form Satsuma guides.
| Turn range | Port chain focus | Farm chain focus | Notes |
|---|---|---|---|
| 1–5 | 200–400 income from port trade | 150–250 income from tax | Trade starts slow but compounds |
| 6–10 | 600–900 income, first matchlock stack funded | 350–500 income | Tax plateaus without castle support |
| 10–15 | 1100–1400 income, second stack unlocked | 550–700 income | Matchlock upkeep spikes here |
| 15–20 | 1500–1800 income, Imperial research funded | 700–900 income | Farm chains need castle to scale |
The takeaway is that Satsuma's economy doubles roughly every five turns if you commit to the port, while a tax-heavy opener plateaus before turn ten. That compounding income is what lets the player fund two matchlock stacks and a small navy by the time the Realm Divide triggers, which is the moment the Satsuma campaign either takes off or collapses.
Which Buildings to Skip Early
Not every province building earns its slot in the first ten turns. For a Satsuma opening, the temptation to build a Yari Dojo or a Samurai Academy before the matchlock rush is one of the classic mistakes that veteran Satsuma guides on Steam flag as campaign-killers. The Imperial faction is designed around a different unit curve, and a samurai building chain in the early game is wasted money.
The right priority list, in order, looks like this, and every choice below is gated by the Imperial research path's matchlock node in the Bushido tech tree — Satsuma players who front-load a samurai building chain waste roughly 8–10 koku per turn that should be rerouted into the Matchlock Dojo chain and a tier-two port in Kyushu, since the faction's matchlock ashigaru line only opens after the second Teppo research and a single castle settlement in the home province.
-
Port upgrades first: every level of port improves trade volume, which funds the next two items.
-
Matchlock dojo second: the only military building that matters for the first fifteen turns, because it unlocks the matchlock ashigaru line that the campaign is built around.
-
Castle support third: a small castle chain keeps public order stable and unlocks later research, but only after the port is at tier two.
-
Naval chain fourth: a single bune ship defends trade routes and raids Shogunate ports, but it should never predate the matchlock rush.
The matchlock switch is the linchpin of the entire Satsuma campaign, and skipping it collapses the Imperial research path into pure dead weight. Without unlocking the Teppo node in the Bushido tech tree, players are left fielding Shogunate-style yari ashigaru and bow ashigaru at a time when the matchlock ashigaru line's range and armor-piercing DPS would otherwise delete Aizu and Nagaoka stacks in two volleys, and the 8–10 koku per turn wasted on a samurai building chain funds nothing the Imperial economy can actually use — leaving the player running a Shogunate roster on a Shogunate economy, which is the worst of both worlds.
The Matchlock Rush: Building the First Stack
The core military decision in the Satsuma opener is how many turns you want to spend on the transition from a mixed yari/ashigaru opening army to a pure matchlock line. According to the Satsuma walkthroughs on the r/Shogun2 subreddit, most experienced players commit to the switch between turns ten and fifteen, which is when foreign trade income is high enough to cover the upkeep spike and the first Imperial research is just unlocking tier-two matchlock units.
Recommended First Stack at Turn 12
The first real Satsuma stack should look like a mix of matchlocks for damage, yari ashigaru for screening, and a small cavalry wing for chasing routing units. The exact ratio depends on who you are fighting, but the safe default looks like this:
| Unit | Role | Number in stack | Upkeep tier |
|---|---|---|---|
| Matchlock Ashigaru | Ranged line | 8–10 | Mid upkeep, anti-infantry |
| Matchlock Samurai | Elite ranged | 2–4 | High upkeep, anti-samurai |
| Yari Ashigaru | Spear wall | 4–6 | Low upkeep, anti-cavalry |
| Katana Samurai | Melee hammer | 2 | High upkeep, anti-general |
| Light cavalry | Flanker and chaser | 2 | Mid upkeep, mobility |
| General | Aura and morale | 1 | Fixed cost |
The matchlocks do the work. Eight matchlock units in line formation can break a yari ashigaru charge before it reaches melee range, and the Yari Ashigaru line in front gives the guns time to reload. A common mistake is to bring too many matchlocks, because the reload time is the unit's only real weakness, and a stack with sixteen matchlocks and no screen loses to the first cavalry charge it faces.
The Imperial Research Path
The Imperial research path is shorter and more focused than the Shogunate equivalent, but it has a clear order that the Fall of the Samurai technology breakdown describes as a three-tier branch. Tier one unlocks matchlock line infantry, tier two unlocks modernised arms and naval upgrades, and tier three unlocks artillery and the late-game industrial units. The right research order for a Satsuma opening is:
-
Tier one priority: the matchlock line, because the unit is the campaign's identity.
-
Tier two priority: modern arms, which boost the matchlock accuracy and reduce reload time.
-
Tier three priority: artillery or railway, depending on whether you are defending or pushing.
Holding the research order matters because the Satsuma economy is built on early trade income, and burning research on artillery before the matchlock line is unlocked is the kind of mistake that puts the player two tiers behind the Shogunate at the moment the Realm Divide hits.
The Imperial vs. Shogunate Decision: How to Use the Realm Divide
The Imperial vs. Shogunate faction split is the single biggest strategic choice in Fall of the Samurai, and the Satsuma campaign makes it more interesting because Satsuma starts on the Imperial side, but the player can still choose when to trigger the full Imperial commitment. According to the Fall of the Samurai Wikipedia entry on the Imperial and Shogunate systems, the Imperial route forces the player into a Realm Divide scenario where every clan on the map becomes hostile, and the campaign becomes a race to capture the Emperor in Kyoto before the AI can coordinate a counterattack.
How the Realm Divide Actually Triggers
Realm Divide in Fall of the Samurai works on a fame threshold, not on a hard turn counter. As the Satsuma faction accumulates Imperial fame, the meter fills, and when the meter tops out, the campaign switches into a free-for-all where every clan — Imperial or Shogunate — is at war with the player. The right trigger point, according to long-running Satsuma walkthroughs, is turn twenty-five to thirty, by which point the matchlock stacks are fielded, the port chain is at tier three, and the player has at least one buffer province between the capital and the nearest hostile neighbour.
| Trigger condition | Risk | Reward |
|---|---|---|
| Trigger at turn 20 | Very high — stacks not ready | Maximum buffer to reach Kyoto |
| Trigger at turn 25 | High — economy still scaling | Two matchlock stacks ready |
| Trigger at turn 30 | Medium — economy mature | Three stacks ready, slower pace |
| Trigger at turn 35+ | Low risk | AI is more developed, harder Realm Divide |
The pattern is simple. The earlier the trigger, the softer the AI, but the weaker the Satsuma economy. The later the trigger, the stronger the economy, but the more time the AI has to consolidate. The cleanest Satsuma runs, according to Steam guide authors, hit the trigger between turn twenty-five and twenty-eight, which is the smallest practical window.
Satsuma's March to Kyoto
Once the Realm Divide fires, the campaign turns into a strategic race. The Satsuma capital is in southern Kyushu, which means the player has to either march an army up the western coast of Honshu or sail a fleet into the Inland Sea and land a strike force near Kyoto. According to the Fall of the Samurai faction overview, the canonical path is the western march because it leaves the player's home province defended by a garrison, and the matchlock-heavy army shreds the yari ashigaru garrisons the AI stacks along the way.
A practical march order looks like this: open the campaign map, pin the Satsuma capital as the origin, queue every matchlock unit and the bune squadron onto a single "March" stance, and force-march west along the San'yō road, chaining auto-resolve odds above 9:1 so no katana samurai spearmen break the line. Because Satsuma's matchlock units reload slowly and burn ammunition in a single volley, the player must disable "fire at will" and use "volley fire" only when the enemy yari ashigaru close within 80 meters, otherwise ammo is wasted on routing enemies.
-
Stage one: secure the home province and build a garrison matchlock unit in each castle.
-
Stage two: recruit two matchlock stacks and a single bune squadron for the sea crossing.
-
Stage three: march west through Shogunate territory, fighting only defensive battles to conserve ammo.
-
Stage four: cross the Inland Sea, land north of Kyoto, and capture the Imperial capital in three turns.
The campaign is won or lost on the four-stage timing because Satsuma's economy leans on sustained trade income from southern Kyushu ports like Kagoshima and Hirado, so any turn the player idles on the San'yō road costs roughly 300–500 koku in forfeited caravans while the Realm Divide penalty continues compounding against every AI clan. A long grind bleeds the treasury dry, which is why the four-stage timing must compress the Kyoto capture into roughly ten turns post-Realm Divide rather than the thirty-plus turns a cautious player might prefer.
Comparing Satsuma to the Other Imperial Clans
The Imperial side has five playable domains, and each one plays very differently. Satsuma sits in the middle of the pack on the difficulty curve, but it is the cleanest "first Imperial campaign" because the southern start gives the player a defensible opening position and a port-based economy that compounds. For a wider breakdown of how the Imperial and Shogunate faction pools compare in the Fall of the Samurai technology branch, the faction identity table below gives a quick read.
| Faction | Allegiance | Core strength | Core weakness | Difficulty |
|---|---|---|---|---|
| Satsuma | Imperial | Trade, matchlocks, port chain | Long march to Kyoto | Intermediate |
| Tosa | Imperial | Stronger naval focus, diplomacy | Weaker opening army | Intermediate |
| Choshu | Imperial | Best opening army, fast research | Surrounded, no port | Advanced |
| Hizen | Imperial | Coastal trade, foreign relations | Small province pool | Intermediate |
| Ogaki | Imperial | Central position, buffer states | Trade income limited | Advanced |
| Aizu | Shogunate | Castle defence, traditional units | Slow modern path | Intermediate |
| Nagaoka | Shogunate | Modern units, commercial income | Weak garrisons | Advanced |
| Jozai | Shogunate | Guerrilla movement, ambush speed | Low unit quality | Advanced |
| Obama | Shogunate | High tax, cheap land upkeep | Few unique units | Beginner |
| Sendai | Shogunate | Diplomacy, soft public order | Northern position | Intermediate |
Satsuma's row is the median for difficulty and the top row for combined trade plus military identity, which is why the clan is usually the second or third pick in a new player's Fall of the Samurai run after they have completed the base game.
How Satsuma Compares to a Shogunate Opener
The most important contrast for a player choosing between Satsuma and an Aizu or Nagaoka campaign is the role of castles. The Shogunate side is built around castle defence, yari walls, and retainer-heavy garrisons, while the Satsuma side is built around a mobile matchlock line, port trade, and a single march to Kyoto. Picking Satsuma over Aizu is a commitment to mobile warfare over castle warfare, and the player should expect to fight in the open field more often than behind stone walls.
A player who likes holding ground and grinding sieges will get more out of a Shogunate opener. A player who likes aggressive line-infantry combat, economic snowballing, and a single decisive march will get more out of Satsuma. Both are valid playstyles, and the right pick is the one that matches the player's preferred Fall of the Samurai rhythm.
Frequently Asked Questions
What makes Satsuma different from the other Imperial clans in Fall of the Samurai?
Satsuma combines a strong matchlock ashigaru line with a port-based foreign trade economy and a southern starting position that gives the player a defensible opening. Choshu has a stronger military start but no port, and Tosa leans even harder on trade but with a weaker opening army, which is why Satsuma is often the cleanest first Imperial campaign.
When should the Satsuma player trigger Realm Divide?
The right Realm Divide window for a Satsuma run is between turn twenty-five and turn twenty-eight, after the matchlock stacks are ready and the port chain is at tier two or three. Triggering earlier leaves the stacks under-equipped, and triggering later gives the AI time to consolidate a counter-coalition around Kyoto.
Is Satsuma a good first faction for a new Fall of the Samurai player?
Yes, but only after one or two runs with a Shogunate faction to learn the gunpowder combat mechanics. Satsuma is intermediate in difficulty because the Realm Divide timing is unforgiving, and a new player who triggers it at turn fifteen with one matchlock stack will lose the campaign to the first coordinated AI response.
How does the Satsuma economy compare to a Shogunate clan like Aizu?
Satsuma runs on foreign trade through the port chain, which compounds quickly but requires the player to defend the port. Aizu runs on tax income and castle-supported garrisons, which is slower but more stable. A Satsuma campaign is an aggressive snowball, while an Aizu campaign is a defensive grind.
What is the biggest mistake new Satsuma players make?
The most common mistake is over-investing in the castle chain before the matchlock rush, which delays the Imperial research and leaves the player with a Shogunate-style army in a faction designed for modern infantry. The port chain and the matchlock dojo are the only two buildings that matter in the first fifteen turns, and any other investment is delaying the campaign's identity.