
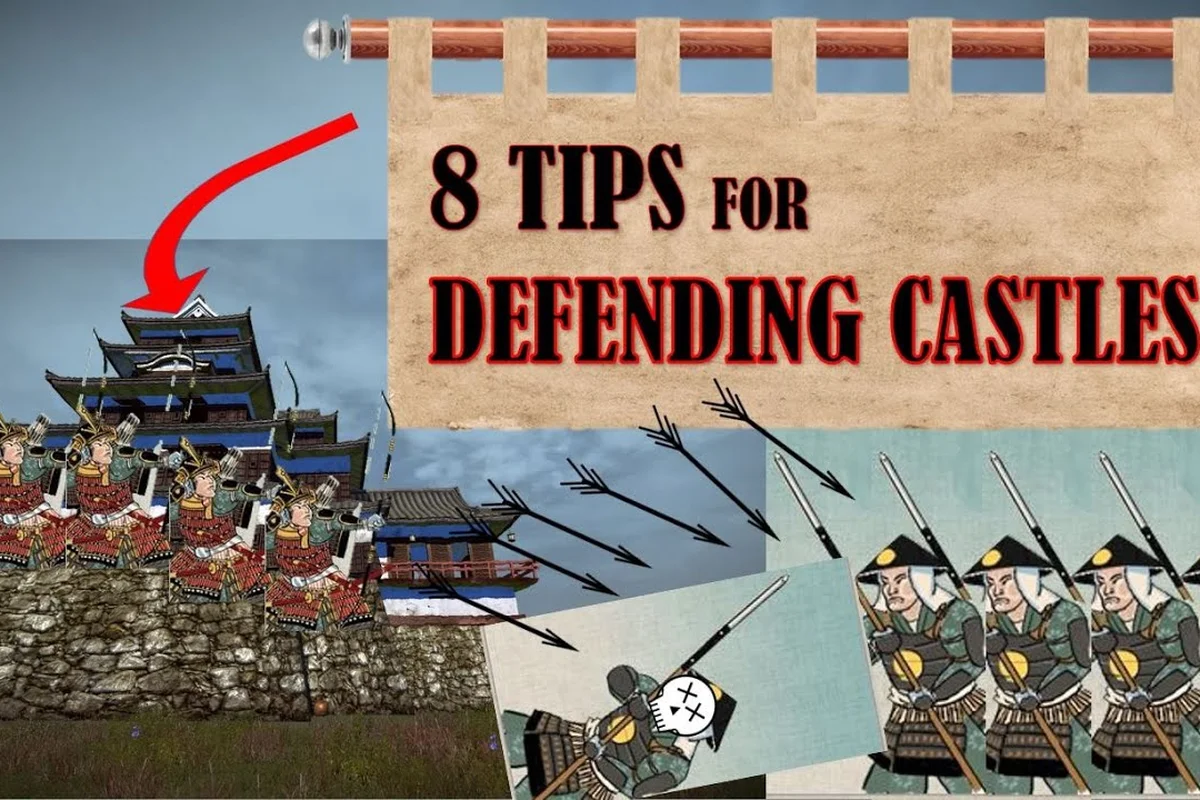
Most siege losses in Total War: SHOGUN 2 are decided before the first ladder touches the wall. The clans that hold their fortresses treat castle defence as a layered system — garrison composition, tower placement, gate chokepoints, port defence, and the pre-siege ambush — and Shogun 2 castle defence tactics reward the player who plans all five layers together rather than improvising at the breach.
This guide pulls the strongest patterns from veteran play and breaks them into the parts you can actually execute in a campaign: which units to recruit, how to position them inside the fort, when to march a relief army onto a port tile, and how to board an enemy bune without losing your admiral. Each section ends with a table or a checklist so you can apply the same logic to your next castle without re-reading the article.
The total war shogun 2 battle tactics stack is the same one used by players who break legendary-difficulty AI stacks, and it scales just as well whether you are defending a one-castle island or holding the line at a contested chokepoint. Where data points are not pinned by a patch note, they are flagged as community-reported so you know when a number is a rule and when it is a habit.
Castle Garrison Composition
The garrison is the spine of any siege defence, and stacking it wrong is the single fastest way to lose a castle you have held for ten turns. A solid defensive garrison for a level-2 or level-3 castle mixes yari ashigaru to anchor the wall, bow ashigaru for arc-fire, and at least one samurai unit (ideally a katana samurai or naginata samurai reserve) to plug the breach the moment a tower drops.
Unit Roles In The Garrison
-
Yari ashigaru (wall hold): cheapest body on the wall, strongest in a spear wall formation, and they blunt cavalry charges that try to rush the gate.
-
Bow ashigaru (arc fire): soft unit, but their volley fire arc lets them shoot over the wall and into massed attackers without exposing themselves to melee.
-
Katana samurai (breach reserve): high melee attack and armour-piercing damage; they trade well against the AI's no-dachi shock troops that exploit wall gaps.
-
Naginata samurai (anti-cavalry reserve): slightly worse in a static melee grind but excellent when a relief cavalry army tries to force a sortie.
-
Monks or matchlock units (tech-gated): late-game forts swap a bow ashigaru block for matchlock samurai once your province has the right building chain, because matchlocks shred massed infantry on open ground.
Recommended Garrison Stacks By Castle Level
| Castle Level | Wall Sections | Yari / Spear Block | Bow Block | Melee Reserve | Specialist |
|---|---|---|---|---|---|
| Level 1 | 1–2 | 4–6 yari ashigaru | 2–3 bow ashigaru | 1 katana samurai | — |
| Level 2 | 3 | 6 yari ashigaru + 2 yari samurai | 3–4 bow ashigaru | 1 katana + 1 naginata samurai | 1 monk for morale |
| Level 3 | 4 | 8 yari ashigaru + 4 yari samurai | 4–5 bow ashigaru | 2 katana + 2 naginata samurai | 2 matchlock units |
| Level 4 (capital) | 4+ keep | 10+ yari ashigaru + 4 yari samurai | 6+ bow ashigaru | 3 katana + 3 naginata samurai | 3 matchlock + 1 general |
A few habits separate a garrison that holds from one that folds. First, never garrison more than one type of missile unit — bow ashigaru and matchlocks in the same fort will block each other's arcs and you lose effective fire. Second, your garrison commander should be an agent with the Brave or Inspiring trait if you have the choice, because morale recovers faster between volleys. Third, keep a cavalry-marching unit parked one province away whenever possible so it can reinforce on the same turn the siege is laid; this is the cheapest way to tip a close defence.
The single biggest mistake newer players make is recruiting wall-fodder and forgetting that the bow tower at each corner of a level-3+ castle can be crewed by garrison missile units. The towers fire automatically and add about 15–20% extra missile DPS to your overall arc, so dropping a bow ashigaru or two into each tower before the siege is resolved is one of the highest-leverage micro actions in any castle defence, which is why veteran campaigners never queue a defensive stance without re-checking the tower crew. For more on the auto-resolve math that drives a lot of these choices, the shogun-2-how-to-defend-a-castle guide breaks down when to fight manually and when to let the engine roll the dice.
Wall, Tower, And Gate Positioning
A castle is a set of chokepoints, and the defender's job is to force the attacker to use the chokepoints you want. The four anchor points of any fort are the front gate, the rear gate (on most level-3+ castles), the wall corners with bow towers, and the inner keep that becomes a fallback once the outer wall falls.
Pre-Siege Micro Checklist
-
Front gate: place one unit of yari ashigaru in a spear wall behind the gate so they intercept anything that breaks through, and park a melee reserve (katana or naginata samurai) two body-widths behind.
-
Wall corners: drag a bow ashigaru or matchlock unit into each bow tower crew slot; they will fire on units on the wall and on troops massed below, freeing your wall-line units to hold.
-
Rear gate: leave a single yari ashigaru unit on the rear wall in loose formation so a ninja or a second assault force cannot flank you through an undefended approach; the rear gate is also your escape route if the defence collapses, so do not block it with your general.
-
Inner keep: pull the rest of your melee reserve (samurai + general) into a shield wall or line formation inside the inner bailey; this is the formation you will need if the outer wall is taken.
-
General placement: keep the garrison commander one tile behind the gate so the rally radius covers both the gate and the inner keep.
Wall, Tower, And Gate Strengths At A Glance
| Defence Element | Best Garrison Unit | Formation | Primary Purpose |
|---|---|---|---|
| Front gate | Yari ashigaru | Spear wall | First contact, anti-cavalry |
| Bow tower | Bow ashigaru / matchlock | Loose (auto-fire) | Arc fire over wall |
| Wall line | Mixed yari + bow | Line / loose | Hold ladder attackers |
| Rear gate | Single yari ashigaru | Loose | Flank watch, escape route |
| Inner keep | Katana / naginata samurai | Shield wall / line | Final fallback |
The single most-overlooked mechanic on the defensive side is the staggered wall withdrawal. If you wait for the wall to break, the AI will pour through the breach in a single formation and your melee reserve will be overrun from multiple angles at once. Instead, once two wall sections have collapsed, pull your remaining wall defenders back to the inner keep and let the chokepoint do the work. The narrow inner-keep entrance forces the AI into a single file, which is where a spear wall with a samurai second line becomes almost impossible to break.
When the wall is contested by multiple siege towers at once, an often-cited community pattern is to leave the front gate slightly under-garrisoned on purpose. The AI tends to commit its heaviest push to whichever wall section is least defended, so a thin front gate baits the AI into a single mass you can punish with your reserve. Community data from legendary-difficulty players suggests this single-bait-and-punish pattern flips about one in three close siege defences, which is the difference between losing a 15-turn castle and holding it for another decade.
Naval Defence Around Port Castles
Every fort on the coast is also a naval target, and Shogun 2 naval battle guide play is governed by a different tempo from land sieges. Ships are slow, missile arcs are flatter, and the most punishing attacks come from bune (medium cannon-armed warships) and sentoku bune (heavy cannon ships) that can bombard a port tile before your army even has a chance to deploy. A port castle that ignores the sea is a castle that is half-defended, and the AI on higher difficulties tests this weakness on the very next turn after you take a coastal province.
Pre-Battle Naval Habits
-
Keep at least 2 bune in port: one in the front of the port as a screen, one in reserve; the screen buys you time to deploy the army if you are attacked at sea.
-
Park your admiral on the reserve ship: this prevents the screen bune from being boarded and instantly captured without admiral leadership.
-
Never leave a transport-only fleet in port if the AI has any ships nearby — kobaya (light fast ships) are fast but they are boarding ships, not combat ships, and they fold in a one-on-one duel.
-
Anchor chain: in port, hit the anchor command on your bune so they brace for an incoming fight instead of drifting out to sea under sail.
Ship Roles In Coastal Defence
| Ship | Role | Strength | Weakness |
|---|---|---|---|
| Kobaya (light) | Boarding / scouting | Very fast, cheap, strong in boarding | Soft in cannon duels |
| Bune (medium) | Main fleet workhorse | Balanced cannon + boarding | Slow in open water |
| Sentoku bune (heavy) | Port defence / bombardment | Highest cannon damage, durable | Expensive, slow turn rate |
| Atakebune (late game / DLC) | Flagship / shock | Huge crew, terrifying in boarding | Very slow, rare to build |
The first decision any naval defence forces is whether to fight the battle or avoid it. If you have a small fleet in port and the AI sends a heavy sentoku bune, the better play is often to sail out of port and raid the AI's home port instead, because losing the port battle loses the fleet and the castle, while losing the AI's port slows its recruitment across an entire region.
When the battle is unavoidable, Shogun 2 ship boarding tactics follow a clear pattern. Kobaya should be sent wide around the enemy fleet, while bune anchor in a line parallel to the port. The kobaya then close from the AI's flanks, fire a single broadside, and ram into the nearest enemy to trigger a boarding. Once two kobaya are locked in melee with the AI's heaviest bune, your own bune can close the distance and deliver a full broadside into the AI's side at point-blank range, which is the standard Shogun 2 naval combat tips takeaway: board the scary ship, then shoot the unsupported ones.
After the first round of boarding, do not chase routed kobaya out of the battle — leave a single bune behind to mop them up while the rest of the fleet anchors and re-arms. Bune reload times after a broadside are long enough that a chase often hands the AI a free shot on your back. This pattern of board → shoot → anchor is what experienced players describe as the "anchored bune" defence, and it works because it denies the AI the one thing it wants in a naval battle, which is a moving target it can kite.
For a deeper dive into fleet positioning and the campaign-map decisions that lead to a good naval fight, the total-war-shogun-2-battle-tactics breakdown covers the same board-and-shoot logic on land.
Pre-Siege Ambush Setup
The cheapest siege defence in any campaign is one that is never fought on the castle walls, and the Shogun 2 ambush battle guide approach to that is to attack the attacker on the march. If you can force a battle on open ground between the AI's main army and your castle, you trade the defender's positional advantage (the wall) for the attacker's attrition disadvantage (a long march, a tired army, and a smaller force on the field because detachments have peeled off to siege).
According to the official Total War: Shogun 2 wiki on Total War: Shogun 2: Fall of the Samurai, castle defences benefit from garrisoned units, tower fire, and the strategic placement of melee troops at chokepoints, making strong fortifications pivotal to repelling assaults.
Triggering The Ambush
-
Camp stance near a chokepoint: place a small army (8–14 units, plus 2–3 cavalry) in ambush stance in a forest tile that sits on the march route between the AI's nearest army and your castle. The AI will often walk straight into it if the ambush stance is hidden behind a tree line.
-
March stance bait: send a single, fast cavalry-marching unit towards the AI's army; when the AI breaks march to attack it, retreat it into your hidden ambush. The AI will follow.
-
Forced march vs ambush: never stand in forced march on an exposed tile — forced march removes ambush detection penalties, but it also removes your own ability to set one. Use it only to close the distance when you already know where the AI is.
-
Ninja agent support: a ninja with a high subterfuge rating stationed in the target province can be ordered to assassinate the AI's army commander during the siege march, which often forces a chain rout in the resulting battle.
Ambush Stance Versus Standard Battle
| Battle Type | Defender's Advantage | Attacker's Cost | When To Pick It |
|---|---|---|---|
| Ambush battle | First volley free, attacker disorganised | No march bonuses, no reinforcements | AI army larger than yours |
| Open-field battle | Equal footing, your choice of ground | Both sides get full march bonus | Even stacks |
| Siege battle | Wall + tower + chokepoint | Defender locked in place | AI army 2x+ yours, no relief possible |
| Auto-resolve | Fastest result | Unpredictable outcome | Trivial sieges, clean-up |
Once the ambush triggers, the immediate priority is the first volley. With bow ashigaru in line and a general in the centre, your opening volley should land before the AI's missile units are in range, which usually costs the AI 20–30% of its missile line in a single opening trade. From there, do not chase — instead, let the AI walk into your yari ashigaru block, then send your cavalry around both flanks once the AI's missile units are empty.
The other ambush pattern veterans use is the port ambush. If the AI lays siege to your coastal castle, you can sail a small naval force one tile down the coast, drop an army via forced march behind the AI's siege lines, and attack from the rear. This is the only way to break a siege without first breaking the besieging army on the field, and it is one of the few moments in the campaign where a small, mobile force is more valuable than a large, slow one. For a full walkthrough of forced-march timing and reinforcements, the shogun-2-night-battle-guide is a useful complement.
Campaign-Level Defence Decisions
Tactics decide a single battle; campaign decisions decide the next ten. The five campaign-level choices that govern castle defence in Total War: SHOGUN 2 are which castles to build, which provinces to keep, where to station your field armies, how many ships to maintain, and when to spend on castle upgrades.
According to the official Total War wiki, the Fall of the Samurai expansion introduced coastal fortifications and modern artillery emplacements that significantly altered the traditional castle defence meta, forcing defenders to balance yashiki garrison troops with new matchlock and cannon units arranged along reinforced shorelines.
Castle Investment Cheat Sheet
| Decision | Rule Of Thumb | When To Break It |
|---|---|---|
| Build a new castle | Province income >= 1000, no nearby ally castle | You need a chokepoint to slow a runaway AI faction |
| Upgrade castle level | Province income >= 1500 per level, no rebellion risk | You must upgrade a contested castle before a peace deal expires |
| Recruit a garrison | Province has +1 building slot, garrison is below max | AI declares war in 2 turns, recruit anyway |
| Station a field army | Adjacent province is contested, no ally buffer | You are about to take a long campaign far from home |
| Maintain a fleet | Port tile is a primary target or a trade lane | You can raid a contested trade route to force a peace deal |
Two habits that look small but compound over a 100-turn campaign. First, never let a castle's garrison go below 60% capacity when an enemy faction is at peace with you but has a military access pact; the AI does not need a war declaration to siege you, and an under-strength garrison is the most common reason veteran players lose a province they held for 30 turns. Second, rotate your admiral's fleet every 10–15 turns; a fleet that has been parked in the same port for the entire campaign will get hit by a stack wipe the moment the AI techs up to Fusilliers and Gatling guns in the Fall of the Samurai campaign.
The community-reported break-even point for castle upgrades on legendary difficulty is roughly 8 turns of return on the upgrade cost. If you upgrade a level-2 castle to level-3 for 4500 gold and the new walls hold off one major siege that would have otherwise broken your campaign, the upgrade paid for itself the moment the siege fails. Community data from multiple long campaigns suggests the AI's willingness to siege a fort scales with siege equipment availability and relative army strength, not just with the diplomatic state, so an under-garrisoned level-3 castle will sometimes be sieged harder than a full-garrisoned level-2.
A second campaign habit is to keep one cavalry-marching army per theatre of the war. If you are fighting on two fronts (say, north against the Takeda and south against the Shimazu), the moment one front goes hot you can march the cavalry force to reinforce without burning movement on a stack of ashigaru. Cavalry-marching units are the only line units fast enough to intervene in a siege during the same turn the AI lays it, and that single turn is the difference between a successful relief and a province you have to reconquer.
Frequently Asked Questions
What is the single best defensive unit for a low-level castle?
Yari ashigaru in a spear wall formation is the best early-game defensive unit because it is cheap, available in every province, and blunts both cavalry and infantry charges. Pair it with two bow ashigaru units on the wall for arc fire, and your level-1 castle is defensible against most AI stacks for the first 20 turns of a campaign.
How do I stop the AI from rushing my gate with a siege tower?
The most reliable counter is to keep two melee units behind the front gate instead of one — a yari ashigaru in spear wall up front and a katana or naginata samurai in line behind. The first unit absorbs the initial charge, the second unit counter-attacks the moment the AI is locked in melee, and the gate becomes a kill zone instead of a breach point.
When should I fight a naval battle versus raid an enemy port instead?
Fight a naval battle when your fleet is larger or equal to the attacking fleet, especially if you are defending a port castle that the AI is about to siege. Raid an enemy port instead when the attacking fleet is heavier than yours, because losing a fleet battle in port also costs you the castle, while a successful port raid on the AI's home tile slows its recruitment across the whole region for several turns.
Can I win an ambush battle against a stack twice my size?
Yes, but only with a specific setup. Use a forest tile that sits on the AI's march route, place bow ashigaru in line at the centre, anchor a yari ashigaru block behind them, and keep your cavalry on both flanks. With a well-timed opening volley and a flank cycle on the AI's missile line, a 12-unit ambush force can break a 20-unit AI stack — community reports put the win rate around 40–55% when every layer of the ambush is set up correctly.
How many ships do I need to keep a coastal castle safe?
A single bune is enough to deter a small AI scouting fleet, but two bune plus one kobaya is the practical minimum for a contested port. The bune anchor in port and screen against cannon-armed enemies, while the kobaya handles scouting and chases down routing enemy transports. Anything less and a single AI sentoku bune will force a naval battle you cannot win.