
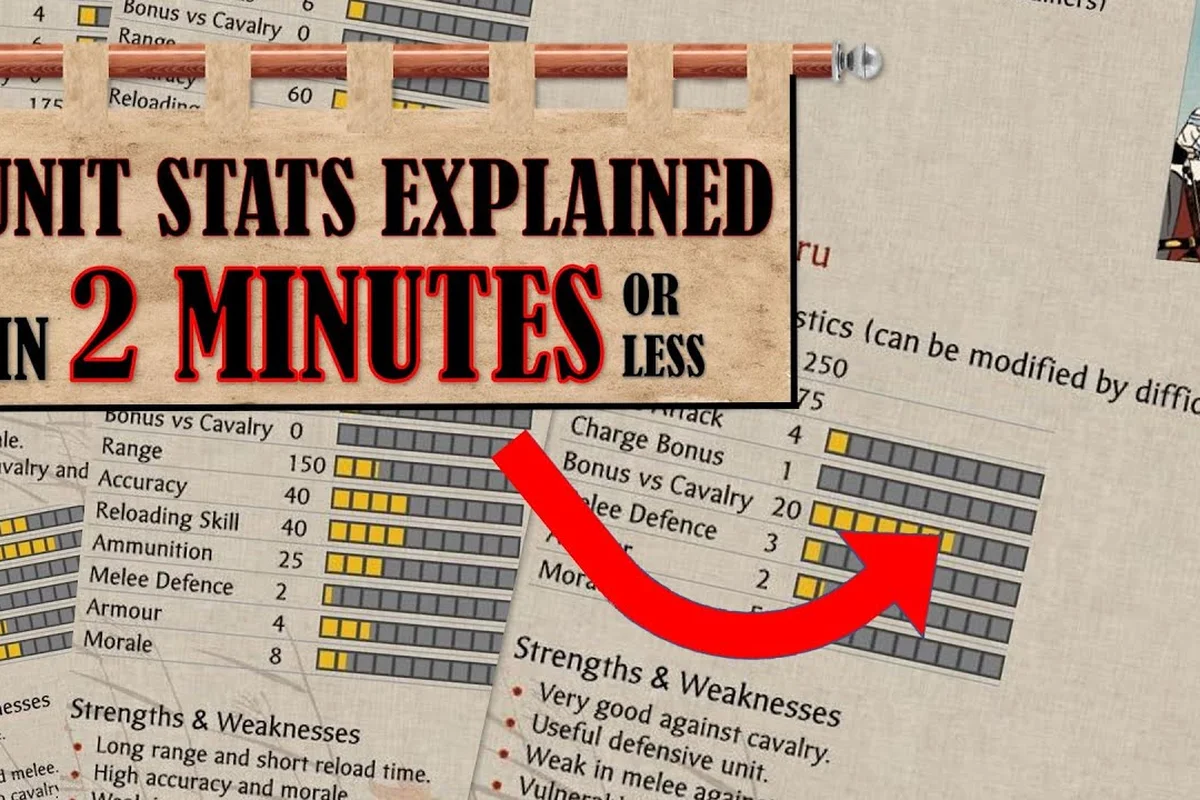
Most Total War: SHOGUN 2 players treat armor and melee defence as a single combined tank stat, but the two numbers behave independently inside the engine, which is why a unit can feel unbreakable in one duel and crumple in the next. The Shogun 2 armor vs melee defence interaction is the single biggest reason frontline infantry feel inconsistent across matchups, especially once Charge Bonus and Morale enter the equation. The guide below decodes the stat math, breaks down which upgrades actually move the needle, and shows how to build a frontline that does not melt under cavalry impact.
The Two Stats, Decoded
SHOGUN 2 ships every melee unit with an Armor value (its shield against missiles and arrow fire) and a separate Melee Defence value (its chance to parry or dodge in close combat). Armor only reduces damage from ranged attacks, including arrows, matchlocks, and siege equipment, while Melee Defence triggers a contested roll every time the unit is struck by another unit in hand-to-hand combat. A high-Melee-Defence, low-Armor ashigaru block will shrug off katana strikes but evaporate under concentrated yari volleys from a defending castle, which is the trap new generals fall into when they read the unit card.
The actual damage formula subtracts Armor from the incoming ranged attack and applies the remaining value to morale and health, while melee combat is a separate d100 roll where both combatants compare Melee Attack against Melee Defence. A 60 Melee Defence unit facing a 40 Melee Attack opponent will parry most incoming strikes, but that same unit against a 70+ Melee Attack enemy starts losing exchanges quickly. The takeaway is that Armor and Melee Defence solve two completely different problems, and stacking one without the other leaves a real hole in the lineup.
| Stat | What It Reduces | Where It Applies | Common Misconception |
|---|---|---|---|
| Armor | Ranged damage | Bow, matchlock, siege | "It also helps in melee" |
| Melee Defence | Hit chance in H2H | Sword, yari, naginata | "It blocks arrows" |
| Charge Bonus | Bonus to Melee Attack at impact | First contact only | "It stacks every combat" |
| Base Melee Attack | Hit chance baseline | Sustained melee | "It scales with weapon skill" |
Because both numbers come from different unit types and different upgrade paths, you can think of Armor as a shield stat and Melee Defence as a parry stat. The community generally agrees that the more you lean on archers and matchlocks, the more Armor matters, while the more you lean on close-order infantry, the more Melee Defence matters, and the highest-ranked players build to the expected matchup before they queue a battle. According to the SHOGUN 2 Steam store page, the base game launched on 15 March 2011 and still holds a Very Positive rating from roughly sixty-eight thousand reviews, which is the strongest evidence that the underlying stat system has held up under more than a decade of community testing.
How Charge Bonus Rewrites the Math
Charge Bonus is a temporary buff to Melee Attack that triggers the instant a unit collides with an enemy, and it decays back to the unit's base Melee Attack within a few seconds of sustained combat. This single mechanic is what makes cavalry and yari ashigaru with the "Run Down" ability so deadly, because the initial impact roll is resolved against a temporarily inflated attack value rather than the unit's resting stat. A unit with 30 Base Melee Attack and 40 Charge Bonus is functionally swinging at 70 for the first exchange, which is enough to overwhelm most base-game ashigaru that ship around 30-35 Melee Defence.
The interaction with Shogun 2 armor vs melee defence is subtle but critical. Charge Bonus does not bypass Melee Defence in any special way, so a unit with 60+ Melee Defence can still parry a charging katana cavalry if the defender's parry roll succeeds. What Charge Bonus does is increase the number of contested rolls that resolve in the attacker's favor, which means the higher the Charge Bonus, the more important the defender's Melee Defence becomes, and the less Armor matters during the opening seconds of a melee. After the charge resolves and units enter sustained combat, both stats fall back to their resting values and the battle becomes a grind of weapon damage, fatigue, and morale.
| Attacker Charge Bonus | Defender Melee Defence | Effective Outcome (opening clash) |
|---|---|---|
| 20 | 30 | Attacker mostly parried, low casualties |
| 40 | 30 | Mixed result, slight attacker edge |
| 40 | 50 | Defender holds, charge fizzles |
| 60 | 30 | Attacker wins most rolls, line breaks |
| 60 | 60 | Coin flip, terrain and fatigue decide |
Community testing on the Total War: Shogun 2 unit guide video by Konglomerat reaches the same conclusion: Charge Bonus matters most against low-Defence units, and stacking high Melee Defence on your frontline is the cleanest way to neutralize an enemy cav charge without spending a general's retinue. The deeper stat math behind Shogun 2 charge bonus explained across forum threads also points out that yari units get a Charge Bonus bonus when charging downhill and a penalty when charging uphill, so the same unit card can perform very differently on the Sagami hills versus the Owari plains.
Morale, Routing, and the Real Cost of Failing a Parry
Every time a unit takes casualties, fails a parry, or sees a nearby friendly unit rout, its Morale meter drops, and once the meter hits zero the unit breaks and runs. Morale damage is applied through two channels: a flat shock value added to the unit's morale pool when a hit lands, and a smaller morale shock every time the unit fails to parry, which is why a unit with 80 Melee Defence can still break under sustained pressure from a high-damage-per-hit weapon. The Shogun 2 morale system explained in any veteran post breaks down to three triggers that compound over the course of a battle: first, hit-and-run missile fire, second, an enemy charge that lands while your unit is already tired, and third, the death of the unit's general or the rout of an adjacent unit.
This is the missing link in most Shogun 2 armor vs melee defence discussions. A unit with 20 Armor and 40 Melee Defence can hold a frontline against katana samurai if the samurai never get a clean charge off, because every parried strike chips the attacker's morale without costing the defender health. The moment the attacker closes the distance, lands a charge, and starts winning contested rolls, the defender's morale starts bleeding even if its hit points look fine on the unit card. A 500-health ashigaru block that has been parrying for two minutes will route before a 300-health samurai block that has been trading hits the whole time, because the ashigaru's morale pool was drained by accumulated near-misses and fatigue.
| Trigger | Morale Shock | Stacks With |
|---|---|---|
| Hit taken (any source) | Low-Medium | Armor reduces it |
| Charge impact (defender) | High | Charge Bonus amplifies it |
| Friendly unit routs nearby | Medium | Already low morale = worse |
| General dies or routes | Massive | All units affected |
The cheapest counter is a high-Melee-Defence front line, because parries add almost no morale shock to the defender while still draining the attacker's morale with every failed exchange. Players who stack Armor at the expense of Melee Defence often see their units route in perfect health, because they were losing the parry war and the morale war at the same time. The same stat logic is why Yari Ashigaru with Horo Bushi upgrades are the community favorite frontline in the cheapest army composition lists, since they combine solid base Melee Defence with bonus morale from the unit type.
Stacking Armor the Right Way
Because Armor only affects ranged damage, the only times it really pays off are when the enemy has brought significant missile or matchlock capability, when you are assaulting a defender with garrison archers, or when you are anchoring a flank on a forested map where you cannot close distance quickly. In all other cases, Armor is a smaller upgrade than Melee Defence on a per-cost basis, which is the central tension behind every Shogun 2 unit upgrades guide published in the last decade. The community generally agrees that you should upgrade Armor on units that will sit in missile exchanges, like Matchlock Samurai or Bow Kobaya, and leave base Armor on melee-only units like Yari Samurai.
The upgrade order that experienced players follow is to grab the first melee-attack or melee-defence upgrade before the first armor upgrade, because the opening engagement is almost always a contested melee rather than a missile duel. Once the frontline is stable, the second upgrade slot usually goes to a morale or charge bonus buff, and only the third slot goes to Armor, and only on units that will end up in a missile exchange. The Shogun 2 cheapest army composition lists published by streamers like The Viking General follow exactly this pattern, and his Total War: Shogun 2 army composition guide video walks through the same upgrade order in a campaign context.
| Unit Role | Stat Priority | Why |
|---|---|---|
| Yari frontline (defensive) | Melee Defence → Morale → Armor | Absorbs charges, must hold |
| Yari frontline (attack) | Melee Attack → Charge Bonus → Morale | Closes distance, must land hits |
| Bow/Matchlock | Range → Accuracy → Armor | Trades damage before melee |
| Cavalry | Charge Bonus → Melee Attack → Morale | One-shot win condition |
| General + Bodyguard | Morale → Melee Defence → Melee Attack | Inspires nearby, must survive |
The same logic flows into the Shogun 2 veteran units guide community posts, because veteran upgrades add a flat bonus to several stats at once, and the value of a 4-stat upgrade is much higher on a high-Melee-Defence unit than on a low-Melee-Defence unit, since the percentage gain in parry chance is larger when the base value is already high. If you want to see how this plays out at the unit level, the Total War: Shogun 2 units overview breaks down which base rosters already come with strong defensive stats and which need the most help from upgrade paths.
Putting It Together: Cheapest Compositions and Matchup Math
The Shogun 2 cheapest army composition that holds up on Legendary difficulty is built around a Yari Ashigaru frontline with Naginata Samurai flankers, because Yari Ashigaru can beat any cavalry charge in the game with their bonus vs large, and Naginata Samurai can beat any Yari wall in a straight melee by trading some parry chance for raw damage. The total unit cost for a 20-stack built on this skeleton is dramatically lower than a 20-stack built around Katana Samurai, and the per-unit upgrade cost is also lower, which is why this composition is the recommended backbone for new players running their first Shogun 2 campaign on higher difficulty levels.
The composition math behind this backbone relies on a simple fact: a Yari Ashigaru with 35 base Melee Defence and 10 base Armor, after two upgrades and veteran status, will reach roughly 50 Melee Defence and 15 Armor for about 600 gold per unit, while a Katana Samurai with 45 base Melee Attack and 30 base Melee Defence will need three upgrades to reach the same defensive numbers and costs 950 gold per unit. The cheaper unit does not just save you money on the unit card, it also saves you money on the upgrade slot economy, because Yari Ashigaru upgrades are unlocked earlier on the building tree than Katana Samurai upgrades. The same cost-vs-stat logic is why the O Ataka Bune ship guide recommends the O Ataka over the larger Bune for budget campaigns.
| Composition | Cost / Stack | Melee Defence | Charge Bonus | Notes |
|---|---|---|---|---|
| 20 Yari Ashigaru + Naginata flanks | ~14,000 | 50-60 | 20-30 | Cheap, holds cavalry |
| 20 Katana Samurai + Bow support | ~19,000 | 35-45 | 40-50 | High risk, high reward |
| 20 Matchlock Ashigaru + Yari screen | ~17,000 | 25-35 | 10-15 | Kills everything at range |
| 20 No-Dachi Samurai + General | ~21,000 | 40-50 | 50-60 | Best duel unit, costly |
The Shogun 2 veteran units guide angle is that veteran status adds a flat bonus that benefits high-base-stat units the most, which means a veteran Yari Ashigaru reaches a higher effective Melee Defence than a veteran Katana Samurai in absolute terms. The same point shows up in the flanking and cavalry charge tactics guide, where terrain bonus + charge bonus + high Melee Defence is the recommended triangle for shutting down an enemy cav line, and the math is identical to the one this guide walks through for the armor vs melee defence interaction.
Building Around the Counter Triangle
Every successful Shogun 2 army composition is built around a counter triangle: Yari beats Cavalry, Cavalry beats Bow, Bow beats Yari. The armor vs melee defence stat math plugs into this triangle directly, because each leg of the triangle emphasizes a different stat, and the unit that wins the triangle is the one whose stat block is best suited to the role it is filling in that engagement. A Yari Ashigaru block must stack Melee Defence and morale to absorb the cavalry charge that bows cannot stop, and a Bow Kobaya block must stack Armor and range to trade damage with enemy matchlocks before they can close to melee. The cleanest way to read the triangle is to ask which stat matters most for the unit's role, and to invest the first two upgrade slots into that stat before any other priority.
The secondary triangle is morale vs damage, which is where Charge Bonus reappears as a multiplier on the damage side and Melee Defence reappears as a multiplier on the morale side. A unit with high Melee Defence can parry indefinitely without taking morale shocks, while a unit with high Charge Bonus lands morale shocks on every clean hit. The winning side of any duel is usually the one whose stat block lets them dictate the terms of the exchange, and a high-Defence defender dictating tempo is a very different fight from a high-Attack attacker landing the first three hits before the defender can parry. For multiplayer contexts, the retainers and veteran unit guide walks through how to tune the same stat block for online matches, where the meta shifts toward a few specific stat breakpoints.
| Role | Primary Stat | Secondary Stat | Avoid Stacking |
|---|---|---|---|
| Anti-cav screen | Melee Defence | Morale | Charge Bonus |
| Cav line | Charge Bonus | Melee Attack | Armor |
| Bow line | Range | Armor | Melee Defence |
| Garrison defender | Armor | Melee Defence | Range |
The community tier list community on YouTube generally ranks compositions the same way, and the SHOGUN 2 units tier list video by MrSmartDonkeyLP walks through the same stat priorities in a ranked format. The deeper point behind all of this is that armor and melee defence are not competing upgrades, they are solving different problems, and the best army compositions stack the right stat for the right role without trying to turn every unit into a hybrid tank.
Frequently Asked Questions
Does Armor reduce melee damage in Total War: SHOGUN 2?
No. Armor only subtracts from incoming ranged damage, including bow arrows, matchlock bullets, and siege weapon strikes. Melee attacks ignore Armor entirely and instead roll against the unit's Melee Defence, which is the contested hit-chance system. This is the most common misconception behind Shogun 2 armor vs melee defence debates, and it is why a low-Armor, high-Melee-Defence unit can hold a frontline against katana samurai.
How does Charge Bonus interact with Melee Defence?
Charge Bonus adds a temporary bonus to the attacker's Melee Attack for the first few seconds of contact, but it does not bypass the defender's Melee Defence roll. A high-Melee-Defence defender can still parry a charged attack, but the contested rolls favor the attacker more often than not, which is why Charge Bonus is so effective against low-Defence units. This is the core mechanic behind Shogun 2 charge bonus explained in most community stat guides.
What stat should I upgrade first on a Yari Ashigaru frontline?
Melee Defence first, then Morale, then Armor. Yari Ashigaru exist to absorb cavalry charges and hold a defensive line, so the stat that lets them parry without taking morale shocks is the most valuable. The Shogun 2 cheapest army composition lists follow the same upgrade order because it produces a 600-gold unit that can hold its ground on Legendary difficulty with two upgrade slots and veteran status.
How does Morale actually break a unit in Shogun 2?
Morale is a hidden meter that drops when a unit takes damage, fails to parry, sees a friendly unit rout, or loses its general. Once morale hits zero, the unit breaks and runs, and most routs happen with the unit at full health. The Shogun 2 morale system explained across community posts breaks morale damage into three triggers: missile fire, a clean enemy charge, and the death or rout of a nearby unit, and the cleanest counter is high Melee Defence plus a stable unit type.
Are veteran upgrades worth it on cheap units?
Yes, more so than on expensive units, because the flat bonus from veteran status multiplies against a higher base stat. A veteran Yari Ashigaru reaches higher absolute Melee Defence than a veteran Katana Samurai, and the same logic is why the Shogun 2 veteran units guide community recommends stacking veteran bonuses on cheap, high-Defence units rather than on already-expensive elites.