
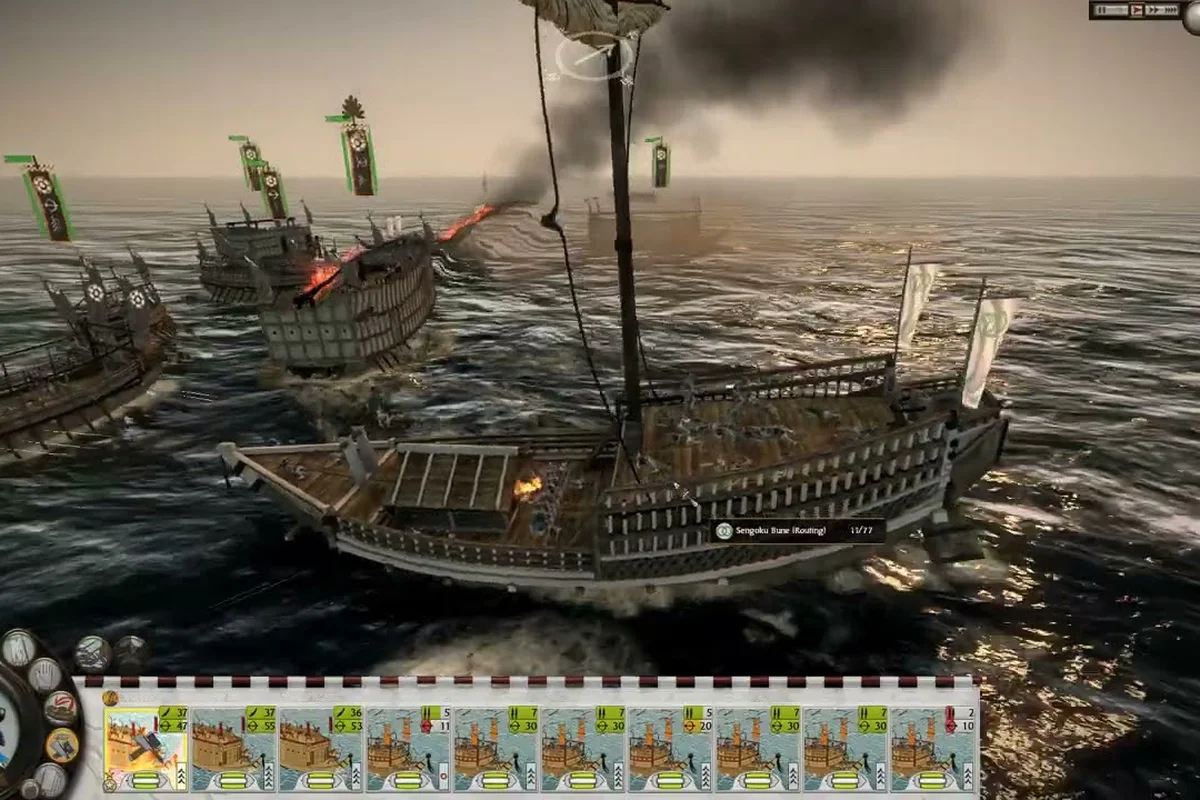
Naval battles in SHOGUN 2 are usually settled long before the boarding ropes come out, and the heaviest hull in the roster is often the reason. This page breaks the Shogun 2 o ataka bune down from recruitment cost and upkeep through to cannon range, crew size, and the matchups it wins or loses against bow bune and yari bune screens. It also covers the practical side: which ports can actually build the hull, how many you can sustain on a typical koku income, and how to escort one so that a single fire arrow does not end your naval campaign.
What the O Ataka Bune Brings to Shogun 2's Naval Battlefield
The Shogun 2 o ataka bune is the campaign's most fearsome floating gun platform, a heavy cannon-armed bune that can shatter enemy fleets and coastal fortifications long before boarding actions ever begin. Players chasing naval supremacy quickly learn that the o ataka bune reshapes the entire island-hopping economy of the Sengoku period, because one well-positioned cannon ship can deny an enemy daimyo a landing zone, blockade a trade port, and act as mobile artillery in support of an amphibious army.
| Role on the naval battlefield | How the o ataka bune fulfils it | Concrete in-game effect | Strategic payoff for a Sengoku island-hopping campaign |
|---|---|---|---|
| Heavy floating gun platform | Sits in the highest naval tier with the longest gun range of any pre-Fall of the Samurai bune | Outranges standard bow bune and yari bune broadside exchanges, dictating engagement terms | One ship can deny a landing zone before the enemy daimyo's fleet closes |
| Coastal artillery support | Acts as mobile artillery for amphibious armies staging from a developed port chain | Provides pre-boarding cannon fire against shoreline defenders and trade ports | Turns a parallel naval force into a force multiplier for the land campaign |
| Trade port blockade | Threatens enemy port buildings and trade routes from a single hull | Forces opposing clans to escort merchant ships or reroute income | Stalls an enemy economy without committing to a full boarding-action fleet |
| Visual signature / intimidation | Earns the "black ship" nickname from the thick smoke pouring off its broadside cannon | Veteran players read the smoke trail from across the battle map | Psychological pressure that often breaks enemy morale before contact |
The unit sits in the highest naval tier and earns its nickname as the Shogun 2 black ship through the thick smoke pouring from its broadside cannon, a visual signature that veteran players read from across the battle map. Because the Shogun 2 base game shipped back in March 2011 and still holds a Very Positive rating from roughly sixty-eight thousand reviews at around 92 percent positive on the official Shogun 2 Steam page, the o ataka bune's role has been tested across thousands of multiplayer and single-player campaigns. According to community data, the unit's strength comes from the gap between its gun range and the short reach of standard bow bune and yari bune, which means an o ataka bune can dictate engagement terms against almost any roster available before the Fall of the Samurai expansion.
Recruiting the o ataka bune is a long-term project, so understanding where it fits in a Shogun 2 best unit composition matters before you sink turn income into a port chain. This guide covers the combat stats, the recruitment chain, the Shogun 2 unit stats explained for the cannon bune family, and how to use the o ataka bune in both campaign and multiplayer fleets. A solid Shogun 2 army build guide should treat naval power as a parallel army, not an afterthought, and the o ataka bune is the keystone of any late-game fleet.
O Ataka Bune Combat Stats and How They Compare to Other Bune
Every Shogun 2 unit stats explained table for the naval line follows a similar structure, but the o ataka bune sits at the extreme end of every offensive metric. The ship carries a single heavy cannon per broadside along with supporting arquebusiers, giving it a hybrid profile that combines the long-range punch of European-style siege guns with the close-combat defense expected of any bune. Players building a Shogun 2 army build guide around amphibious landings will notice the unit's reload time and hull strength together determine how many volleys it can fire before enemy melee bune close the distance.
The table below summarizes the o ataka bune's headline numbers compared to the other standard bune available in the base game. Numbers are based on community testing and may vary by patch, but the relative order between units has been stable since the original release and was preserved when the Complete Edition re-released the title on Steam for current hardware.
| Unit | Role | Crew | Melee Attack | Missile Damage | Range | Ammunition | Speed | Hull Strength | Cost (Turns) |
|---|---|---|---|---|---|---|---|---|---|
| Funa Bune | Scout / light transport | 40 | Low | Low bow | Short | Low | High | Very Low | 1 |
| Yari Bune | Boarding ship | 60 | High | None | — | — | Medium | Medium | 2 |
| Bow Bune | Ranged skirmisher | 60 | Low | Medium bow | Medium | Medium | Medium | Medium | 2 |
| O Ataka Bune | Heavy cannon platform | 80 | Low | Very High cannon | Long | High | Slow | High | 3+ |
The o ataka bune's 80-strong crew is the largest in the standard naval roster, which feeds directly into its boarding defense, because a bune's melee defense scales with crew count and morale. The cannon's very high missile damage at long range means a fleet of two or three o ataka bune can sink an enemy bow bune squadron before it returns a single volley, which is the scenario that earns the unit its Shogun 2 black ship reputation.
Why the Cannon Bune Outranges the Bow Bune
Range is the single most important stat in Shogun 2 naval combat because the engagement initiates the moment two fleets enter line of sight, and whoever shoots first usually shoots last. The bow bune tops out at a medium missile range that the o ataka bune exceeds by roughly thirty percent, which means the cannon bune can begin landing hits while the bow bune is still closing. This range gap is the same reason the O Ataka Bune is widely cited in any Shogun 2 best unit composition discussion as a hard counter to fleets built around bow bune spam.
The cannon also benefits from a high ammunition count, so an o ataka bune can sustain fire for an entire minute of real-time battle without going dry. By contrast, bow bune tend to expend their quiver stock within thirty seconds, and a bow bune that runs out of arrows becomes a slow, fragile transport. Treating the o ataka bune as a sustained-fire artillery piece rather than a one-shot alpha strike changes how you position it: park it at the back of your fleet, behind a screen of yari bune, and let the cannon do the work.
Hull, Speed, and the Trade-Offs of a Heavy Ship
The o ataka bune is slow. Its speed stat is the lowest of any standard bune, which means fleets built entirely around cannon bune can be kited by fast funa bune in open water. Hull strength partially compensates by absorbing arquebus and arrow fire, but a coordinated rush of yari bune will eventually board the ship if no friendly bune screen exists. The cost is also among the highest in the naval roster, both in recruitment turns and in upkeep, so the unit only makes sense once your clan controls multiple wealthy ports.
Players who have studied the Shogun 2 unit stats explained for melee defense know that armor values on ships are largely symbolic because naval combat resolves in one of two ways: ranged volleys or boarding. The o ataka bune's hybrid loadout matters precisely because it can dish out damage during phase one and still defend itself during phase two if a boarding action does occur.
Recruiting the O Ataka Bune and Building the Right Port Chain
Recruiting the o ataka bune requires a developed naval port chain, a strong economy, and the correct technology. Unlike ashigaru or even top-tier samurai, which only need a single province building, the o ataka bune sits at the end of a multi-tier building line that mirrors the land-based progression from levy infantry to elite samurai. According to the Wikipedia summary of the game's units and mechanics, the roster splits between ashigaru and samurai, with ashigaru filling cheap, quickly recruited roles and samurai requiring specific province buildings. The same pattern holds for bune: low-tier ships train quickly, while the o ataka bune requires the highest-tier port. A typical recruitment chain looks like this in a single province with a major port:
| Building Tier | Building Name | Effect | Turns to Build |
|---|---|---|---|
| 1 | Trading Port | Enables trade, basic funa bune | 2 |
| 2 | Military Port | Unlocks bow bune and yari bune | 3 |
| 3 | Major Military Port | Unlocks specialist bune, increases ship capacity | 4 |
| 4 | Master Military Port | Unlocks o ataka bune and sea routes expansion | 5+ |
Each step in the chain multiplies the province's upkeep cost, so most players consolidate naval production into one or two wealthy coastal provinces rather than building a minor military port in every fishing village. The Master Military Port is also the gateway to the o ataka bune's signature role: a floating black ship that can be stationed at sea to project power far from your home islands.
Technology, Tradition, and Faction Variants
Most clans recruit the same o ataka bune once the Master Military Port is online, but faction traditions shape how you use the ship. A clan focused on trade and revere, such as the Hattori or a maritime-minded Shimazu, can squeeze additional income from sea routes and pair the cannon bune with cheaper boarding ships. A clan with bushido bonuses can keep the o ataka bune firing longer because their crews recover morale faster after a tough engagement. The Shogun 2 best unit composition discussion always comes back to this point: the unit is universal in stats, but the doctrines you layer on top change how it plays.
Certain DLC clans, including the Saints of the Hokkaido and the Ikko Ikki, gain access to unique naval units, but the o ataka bune remains the standard top-tier cannon ship for nearly every faction. This is also why the Shogun 2 best unit composition for campaign play almost always lists at least two o ataka bune in the late-game fleet roster: every other ship is a support piece, and the cannon bune is the win condition.
How to Use the O Ataka Bune in Campaign and Multiplayer Battles
The o ataka bune is not a unit you can throw into the line and forget. Its slow speed and high cost mean a misplaced cannon bune can be picked off by a smart opponent who uses funa bune to flank while yari bune hold your front line. The most common tactical pattern is to anchor the o ataka bune behind a yari bune screen, fire broadsides into the densest cluster of enemy ships, and only commit to boarding actions when the enemy fleet has been broken.
In campaign play, the Shogun 2 army build guide for amphibious conquests typically fields a fleet of two o ataka bune, four yari bune, and two bow bune. The bow bune draw enemy fire and screen the cannons, the yari bune absorb boarding attempts, and the o ataka bune destroy the enemy fleet from range. This composition is also the canonical answer to questions about Shogun 2 best unit composition on coastal siege maps, because the cannon bune can fire on castle walls at near-arena distance if you park it next to the harbor.
In multiplayer, the community-driven Shogun 2 unit tier list compiled by TripleZHacker consistently rates the o ataka bune as an S-tier naval unit because of its ability to single-handedly delete fleets built around cheaper bune. The same observation comes through in MrSmartDonkeyLP's tier list, where the cannon bune is highlighted as the unique piece that makes naval maps decisive in the experienced player's favor. Both videos agree that the ship's weakness is its slow speed, and that experienced opponents will try to bait the cannon into a bad angle before closing with yari bune.
Fleet Formations and Engagement Lines
The standard naval formation is a long horizontal line that lets every ship fire both broadsides at once. The o ataka bune fits best in the center, flanked by bow bune for ranged support, with yari bune at the ends to catch flanking funa bune. If you place the cannon bune at the end of the line, an enemy funa bune can slip past and attack from the unshielded side, so anchoring in the center is safer. When the enemy approaches, hold the yari bune slightly forward to absorb the first charge, then let the cannon bune fire into the boarding scrum at point-blank range, where every cannon shot can kill a dozen crew in one volley.
Coastal Siege and Black Ship Tactics
A floating black ship parked just outside an enemy port is one of the most oppressive positions in Shogun 2. The o ataka bune's cannon reaches the port's edge, so any trade ship that tries to enter or leave the harbor will be destroyed. The same logic applies to the Fall of the Samurai expansion's modernized ironclads, which use a similar long-range artillery role but with steam power replacing sails. According to the Fall of the Samurai campaign overview on Wikipedia, the Boshin War setting added Hokkaido, Tanegashima, Tsushima, and Goto to the map, increasing the number of contested straits where an o ataka bune can earn its upkeep. Treating the cannon bune as a static coastal defense rather than a frontline combatant is often the most efficient use of the ship in the late campaign.
Advanced Tips: Pairing the O Ataka Bune with a Land Army
A good Shogun 2 army build guide does not separate land and sea; the two halves of a clan's military have to work together. When launching an amphibious invasion, land your army first, then bring the fleet in close to support with cannon fire. The o ataka bune can blast enemy garrison towers while your ashigaru scale the walls, which is a more efficient use of the cannon than simply trading shots with another fleet. Because the unit's ammunition is high, you can usually fire for the entire duration of a coastal assault without going dry, and the resulting casualties will break the garrison's morale long before your troops have to commit to melee.
Another advanced tactic is the so-called black ship escort, in which one or two o ataka bune protect a convoy of trade ships sailing between allied ports. A single cannon bune is enough to deter a pirate fleet or a hostile daimyo's scouts, and because the ship costs less than a full army, the escort pays for itself in saved trade income. This is also the easiest entry point for clans that want to experiment with naval play without committing a Master Military Port to the project: keep one o ataka bune near your main trade node, and you have a credible defense against most opportunistic raiders.
O-Ataka Bune Handling Mistakes
-
Stacking every o ataka bune into one fleet — three cannon bune look intimidating, but without a yari bune screen they will be boarded and lost in a single coordinated rush.
-
Forgetting the bow bune — bow bune are not strong in isolation, but they are excellent at drawing fire and finishing off crippled ships, which makes them the natural complement to an o ataka bune.
-
Recruiting the cannon bune too early — the unit's recruitment cost is high and the upkeep is brutal; wait until your economy can support it without starving your land armies.
-
Ignoring crew upgrades — like other Shogun 2 units, the o ataka bune benefits from veteran upgrades and retainers that improve reload speed and melee defense. A cannon bune with full veteran upgrades behaves very differently from a freshly recruited one.
For a broader look at how unit stats and armor interact across the entire roster, the armor and melee defence breakdown is a useful companion. The mechanics explained there, especially how morale, charge bonus, and armor reduce incoming damage, apply to the o ataka bune crew just as they do to ashigaru and samurai.
Frequently Asked Questions
Is the o ataka bune worth recruiting in the base campaign?
Yes, especially once you control multiple wealthy ports and have unlocked the Master Military Port building. The o ataka bune is the strongest Shogun 2 cannon bune in the roster, and a single ship can deny a coastline to an enemy fleet. Its high cost and slow speed mean it is a late-game unit, but in any Shogun 2 army build guide for the late Sengoku period it is the keystone of naval power.
How many o ataka bune should I have in a fleet?
Two is the sweet spot for most campaign fleets because the second cannon bune covers the reload downtime of the first and gives you redundancy if one ship is boarded. Larger fleets of three to four o ataka bune work in multiplayer and in siege battles, but they require a sizable yari bune screen to avoid being overrun by fast funa bune.
Does the o ataka bune appear in the Fall of the Samurai expansion?
No, the o ataka bune is a base-game Sengoku unit and is not directly present in the 1864 Boshin War setting. Fall of the Samurai replaces it with modernized ironclads and steam-powered warships, which share the same long-range artillery role. The recruitment philosophy of building a Master-tier port chain is similar, but the specific ship roster is unique to each campaign.
Can the o ataka bune fire on land during a coastal siege?
Yes, the cannon bune can bombard castle walls and garrison towers from outside the harbor, which makes it a powerful support unit during amphibious assaults. Combine it with ashigaru to scale the walls, and the cannon will break the garrison's morale before your troops need to commit to a costly melee push. This is one of the most efficient late-game army compositions in the campaign, and it ties together the naval and land halves of a strong Shogun 2 best unit composition roster.